Nếu blog của bạn chia sẻ nhưng điều mà mọi người đang thích thì việc theo dõi blog của bạn là rất quan trọng, thứ nhất là để họ có thêm đọc những bài viết mới, thứ 2 là mình có thêm những fan thực sự.
Sau đây mình sẽ hướng dẫn bạn cách thêm
Widget theo dõi bài viết qua email.
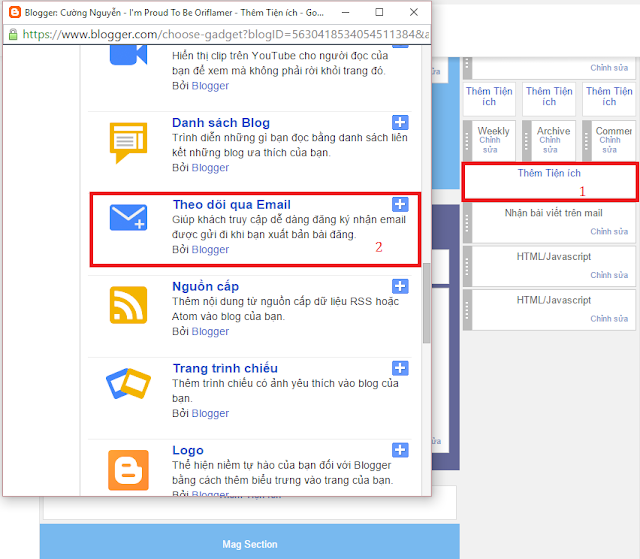
Cách thứ nhất: Sự dụng widget sẵn của blog
 |
| Tiện ích theo dõi qua email |
 |
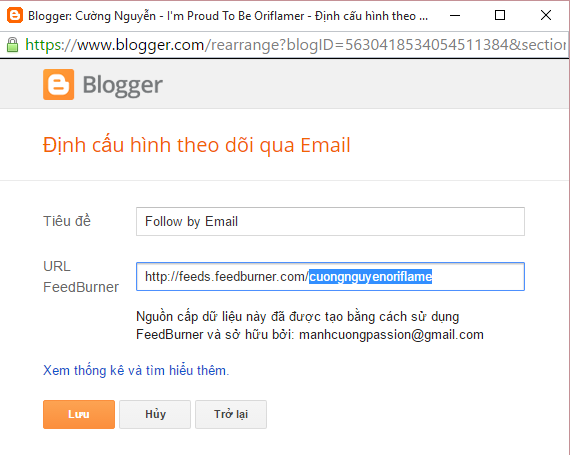
| Cấu hình theo dõi email |
Ở đây id của feedburner của mình là cuongnguyenoriflame, bạn chú ý cái này để mình sẽ hướng dẫn cách thứ 2.
Dùng săn widget của blog thì mình tùy chỉnh css không linh động,
 |
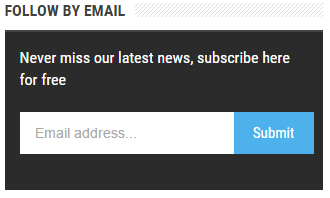
| Theo dõi qua email |
Cách thứ 2: Thêm
Widget theo dõi bài viết qua email bằng cách thêm thẻ HTML.
 |
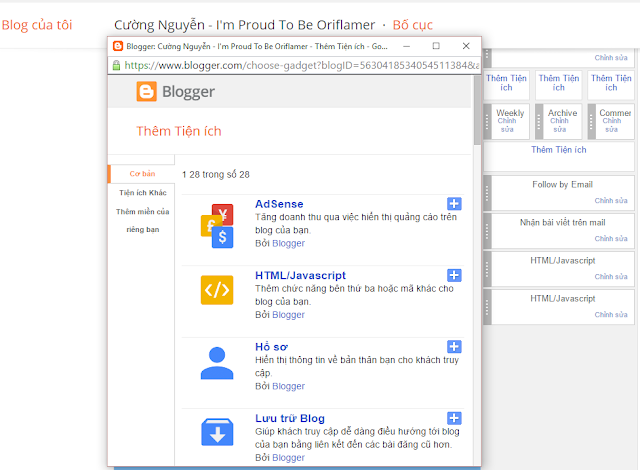
| Thêm theo dõi email bằng HTML |
Chọn HTML/Javascript
 |
| Cấu hình email bằng HTML |
Đây là code HTML:
<link href='http://fonts.googleapis.com/css?family=Open+Sans:300italic,400italic,600italic,400,300,600,700' rel='stylesheet' type='text/css'/>
<div id='emailsubsocial'>
<div class='heading'>
Theo dõi qua email
</div>
<p>Đăng ký bằng email của bạn để nhận được tin mới nhất từ chúng tôi.</p>
<div class='emailsub'>
<form action='http://feedburner.google.com/fb/a/mailverify' method='post' target="popupwindow" onsubmit="window.open('https://feedburner.google.com/fb/a/mailverify?uri=cuongnguyenoriflame', 'popupwindow', 'scrollbars=yes,width=550,height=520');return true">
<input type='text' name='name' placeholder='Tên của bạn' />
<input type='text' name='email' placeholder='Email của bạn' />
<input type="hidden" value="cuongnguyenoriflame" name="uri"/>
<input type="hidden" name="loc" value="vi_VN"/>
<input value="Đăng ký ngay!" class="button" type="submit" />
</form>
</div>
</div>
<style type='text/css'>
#emailsubsocial {
width: 300px;
height: 330px;
border: 1px solid #ddd;
border-radius: 5px 5px 0px 0px;
}
#emailsubsocial .heading {
padding: 15px 25px;
line-height: 35px;
font-size: 26px;
font-weight: 600;
font-family: open sans;
color: rgb(170, 170, 170);
text-align: center;
text-shadow: 0px 1px rgba(255, 255, 255, 0.75);
background: none repeat scroll 0% 0% rgb(247, 247, 247);
}
#emailsubsocial p {
font-family: open sans;
font-size: 13px;
color: rgb(170, 170, 170);
line-height: 25px;
padding: 10px 20px 0 20px;
margin: 0;
}
#emailsubsocial .emailsub {
padding: 0px 20px 10px 20px;
}
#emailsubsocial .emailsub input {
color: rgb(170, 170, 170);
padding: 10px;
margin-top: 10px;
font-size: 15px;
font-family: open sans;
width: 92%;
border: 1px solid #ccc;
border-bottom: 2px solid #ccc;
border-radius: 5px;
transition:border 0.15s linear 0s, box-shadow 0.15s linear 0s, color 0.15s linear 0s;
}
#emailsubsocial .emailsub input:focus {
border-color:#F4836A;
outline: none;
box-shadow: 0 0 2px 1px #F4836A;
}
#emailsubsocial .emailsub .button {
background: #F4836A;
color: white!important;
border:none;
outline: none;
border-bottom: 3px solid #B3614E;
transition:background .4s linear;
width: 90%;
margin-right: 5%;
margin-left: 5%;
font-weight: 600;
cursor:pointer;
}
#emailsubsocial .emailsub .button:hover{
background: #DD7761;
}
#credits {
margin: 0 auto!important;
margin-top: -10px!important;
width: 160px;
}
</style>
Bạn nhớ đổi lại phần màu vàng nha
Chúc các bạn thành công với Hướng dẫn tạo Widget theo dõi bài viết qua email.
If You Enjoyed This, Take 5 Seconds To Share It


0 comments:
Post a Comment